If you prefer to watch a video, scroll to the bottom of this page!
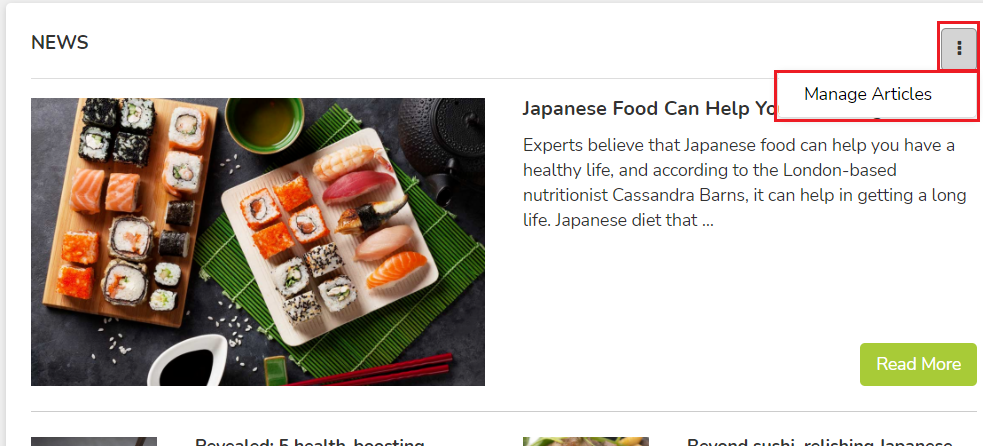
- Click Admin -> Communications -> News Content, or simply click the ellipses (three dot menu) on the News dashboard widget
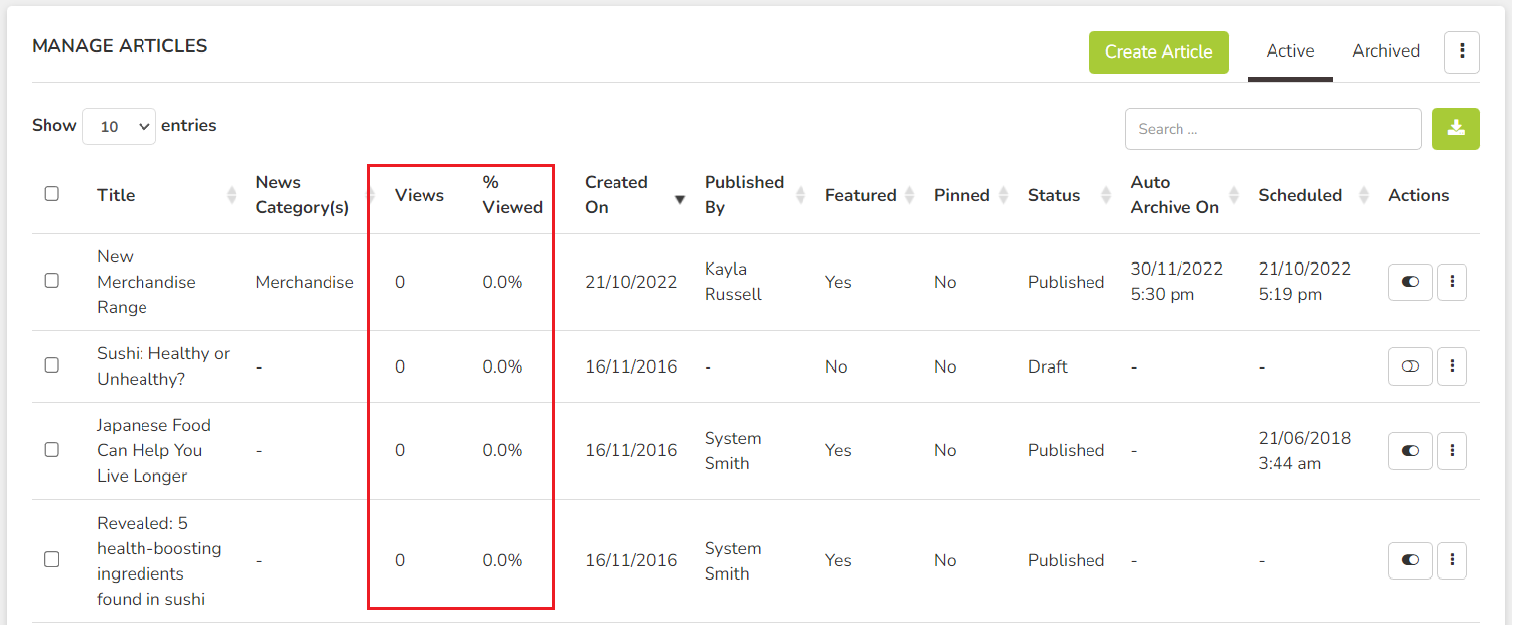
- This is where your full list of news articles will display. Click Create Article on the right corner.
- Add a Title.
- Add your Content (use the toolbar editor to stylize your content with colours, font formatting, images, etc)
- Set/add all the other options for the article:
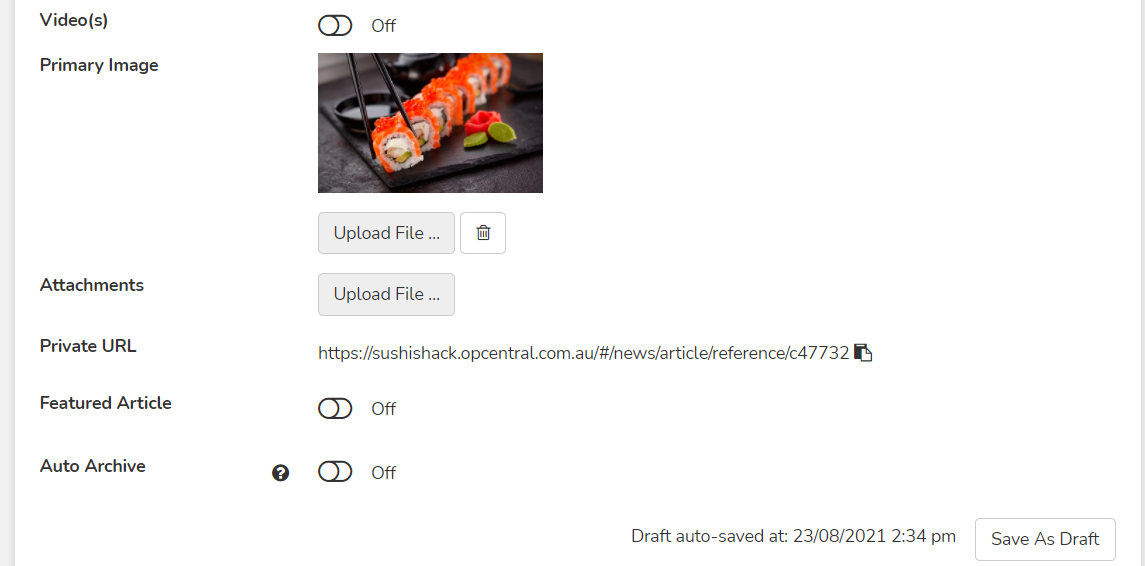
- Video(s): Embed a video by uploading one, or linking either YouTube or Vimeo. Click here for more detail on using videos.
- Primary Image: This displays on the dashboard where the articles are listed.
The recommended minimum size for the Primary image is 500px wide by 200px high; Images are displayed in a 5:2 aspect ratio. Images that meet this sizing will not be cropped or cut off when viewed on different screen sizes, and will automatically re-size to fit within the space.
- Attachments: PDF's, excel spreadsheets, etc, that are all downloadable assets.
- Private URL: This is simply a direct link to the article.
- Featured Article. This puts a banner on the dashboard with the title and link to the article. This banner will scroll through the images in a carousel if there is more than one article is featured.
- If Featured, set the featured banner image. This can be the same as your primary image, or different if you choose.
The recommended minimum size for the Featured image is 1000px wide by 400px high; Images are displayed in a 5:2 aspect ratio. Images that meet this sizing will not be cropped or cut off when viewed on different screen sizes, and will automatically re-size to fit within the space.
- Pin Banner: Toggle this on if you want the image to display as the first image in the featured banner carousel and at the top of the news article list. Otherwise, the carousel will scroll in chronological order (all pinned articles are always displayed first).
- Auto Archive: Enable this toggle to automatically archive this news article after the date selected has passed. Archived articles are not shown on the dashboard, and cannot be found in a search. They will stay stored under the Archived tab for Admins. - Lastly set the Permissions by clicking the Permission tab. Article permissions always default to Roles, however they can be set by User Groups or individual Users as well.
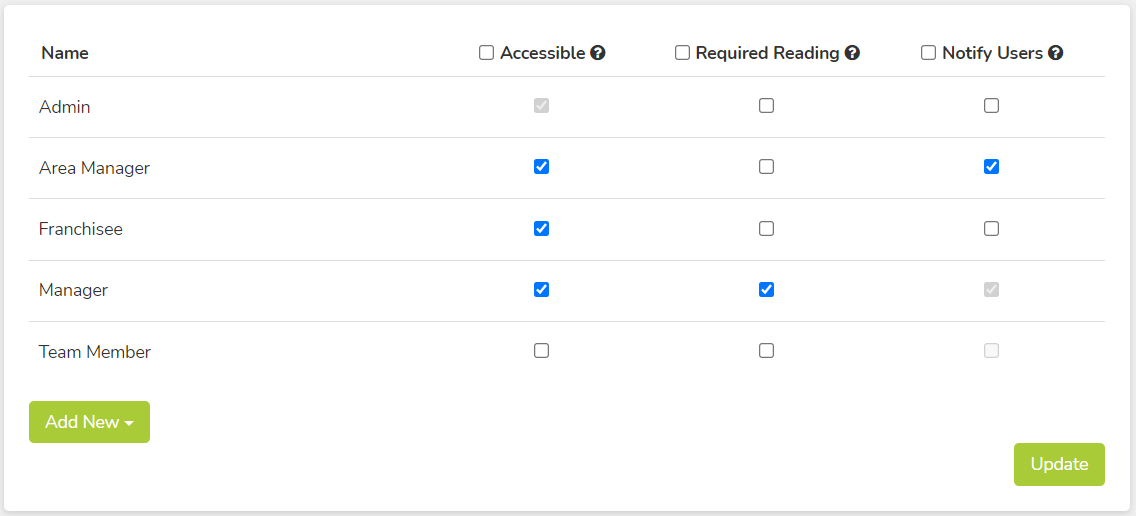
- Notify Users: By clicking this tickbox next to the role, any user with that role will receive an in-platform notification (+1 on the bell icon), an email notification, and a push notification on their phone if they have the mobile app installed.
Note: Users will still get a +1 on the bell icon, even if notify users is not ticked. This is to ensure they don't miss out on announcements when they log in.
- Restrict Access: Use this toggle to set who has access (can see) this article. Once toggled on, you will see an "Accessible" column with tickboxes. If the box is ticked under Accessible, then anyone with that role has access to the article. Once published, these users will get a +1 under their bell icon (notifications) to alert them of the new article. They will not get an email or push notification, unless the Notify Users box is also ticked.
- Required Reading: Use this toggle to set who needs to sign-off and confirm that they have read the article. Once toggled on, you will see a "Required Reading" column with tickboxes. If the box is ticked under Required Reading, then anyone with that role will be required to sign-off (by using an "I Confirm" button) on the article. Once published, each user with that role will receive an in-platform task (+1 on the checkmark icon), an email notification, and a push notification on their phone if they have the mobile app installed. The task will not clear until the article has been signed-off on.
Anyone with Reporting permissions can then see the associated sign-off records for that article (read vs unread).
If the reminder emails have been enabled, any users that do not sign-off on the article within the associated reminder frequency will be reminded to do so via email. - Click Publish and select Publish Now, or choose to schedule your article to be published at a later date. Any users that have been marked off as either Notify or Required Reading will receive those relevant notifications/emails immediately.
- You can see the number of views, % viewed and a list of who has viewed it, who hasn't and the total audience (regardless of whether it was marked off as Notify or Required Reading). Click the three dot menu under Actions to open the Viewer List to see the details.
Note: A "view" is counted as the first time the user opens the article.
To remove the article from the featured banner carousel:
- Within the news content page, under the three dot menu in the Actions column, click "Edit".
- Toggle the "featured article" box off and click Update, then Save Changes.
Note: the video below is a basic follow-along only and does not have audio. It does not cover off every individual setting or feature; it does cover:
- Creating a new article
- Adding a title, and content. The content was pasted from an external source (Microsoft Word Doc) but you can type your own content straight into the content box.
- Adding an embedded image
- Adding a primary image
- Toggling on the Featured article and adding a featured image
- Changing the Permissions between Required Reading and Notify only
- Previewing the article to check formatting, then making some formatting changes to suit.
- Publishing then viewing the Article


