You can create any type of form for logging data and record keeping that you wish with the Forms module. Some examples of these are: Vehicle Damage reports, Leave requests, Customer complaints or Feedback, Staff injuries, Bank or Emergency Contact details, etc.
- In the side menu, click Forms.
Depending on your side menu and package configuration, this may have it's own side menu button, or it will be under Audit Central or People Central. - Click the ellipses (three dot menu), and then Manage Forms
- To create a new form:
Click the Create Form button
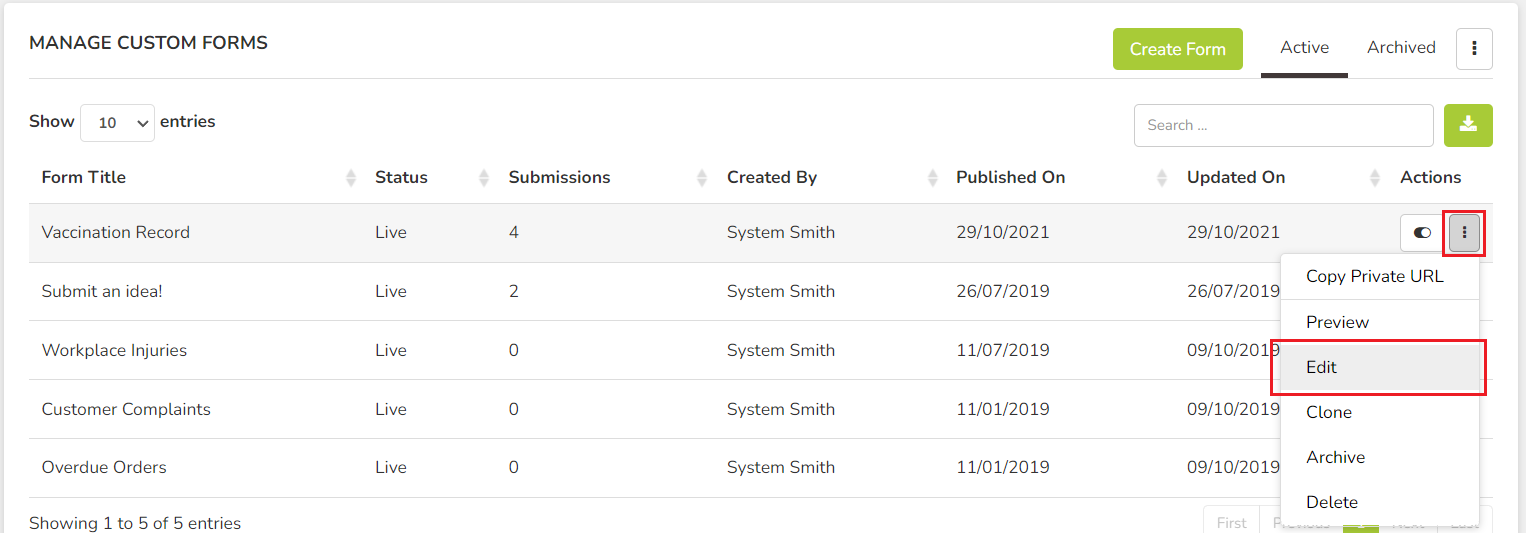
- To edit an existing form:
Click the ellipses (three dot menu) under Actions on the form you want to edit. Then click Edit.
- On the Details tab:
- Title. This is the title of the Form that users will see in the Forms list.
- Instructions. Optional, this text will display at the start (if grouped fields is enabled) or the top (if grouped fields are not enabled) of the form.
- Form Category(s). Optional, this will add the form to a category for easy sorting and viewing.
- Public URL. Enabling this means the form is publicly accessible via an anonymous external URL.
A public URL may be used in situations like a customer feedback or complaint form, where the person filling it out does not have a login to Op Central.
- Grouped Fields. Enabling this will "group" the fields together. The different field groups will display on separate pages to the person filling it out, and they will click "Next" between the group pages.
Note: The Private URL is simply the direct internal link to fill out the form. It cannot be accessed without a login.
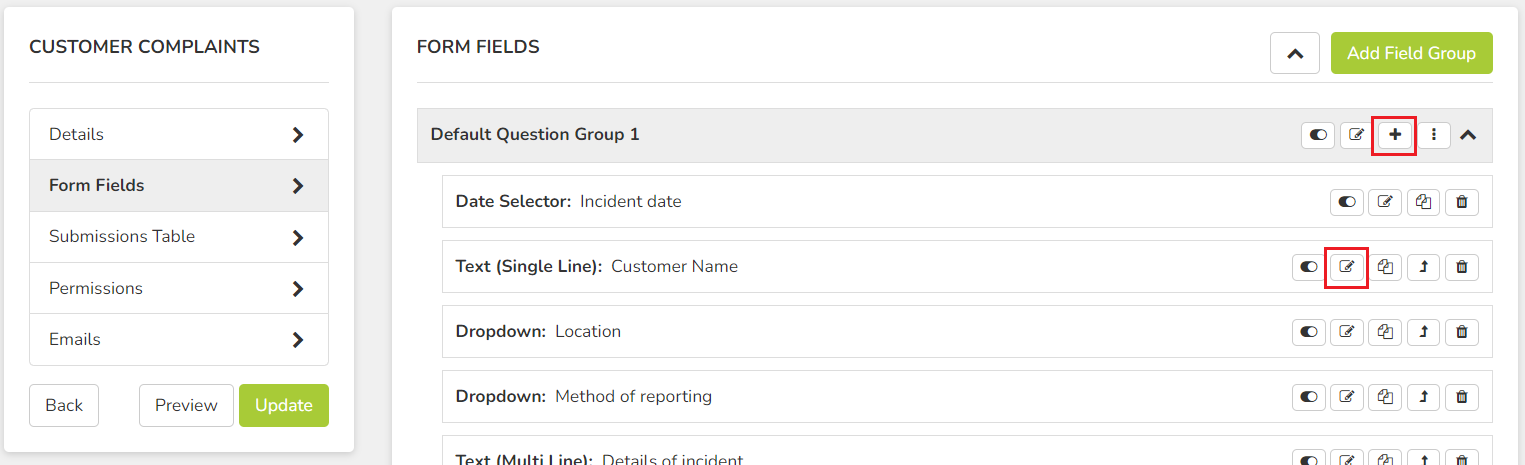
- On the Form Fields tab, this is where you add / edit the form fields the user will be filling out.
6.a - To add a new field when field groups are disabled, click the Add Field button at the top.
Edit an existing field using the edit button on the field.
6.b - To add a new field when field groups are enabled, click the "+" plus button on the field group title. You cannot add a field without a field group, when groups are enabled. To add a field group, click the Add New Field Group button.
Edit an existing field using the edit button on the field.
The different field types are:
- Text (Single Line): Used for a normal plain (unformatted) text response.
- Text (Multi Line): Gives the option for multiple unformatted lines of text rather than a singular line.
- Number: When the response needs to be numerical (cannot do decimal points, use text field for this).
- Radio Button: A single choice tick box.
- Date Selector (with or without time): A calendar that can also include a specific time of day.
- File Upload: Provides an Upload File button where any file type can be attached to the submission.
- Checkboxes: Tick boxes with ability to select more than one.
- Dropdown (with or without multi-select): A dropdown menu of possible responses.
- Linked System Fields (tutorial here): When filled out, this automatically updates the linked user or location data.
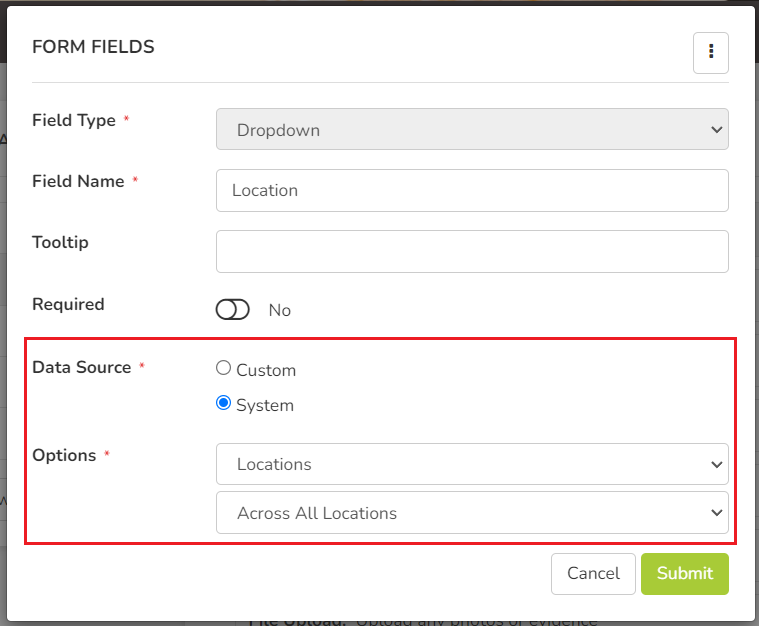
Data Source: Custom vs System definition
When selecting a radio button, checkboxes, or dropdown field type, you will see an option to choose the "Data Source". The default is Custom, which allows you to manually enter whatever response options that you want to give the user.
The System data source will pull information existing in the system, which can be either Users, Locations or Brands.
- The Submissions Table tab allows you to select which of the fields you want to display in on the list of submissions. You can preview what that looks like by clicking the ellipses (three dot menu) and then Preview Submissions Table. You can show/hide the columns by switching the corresponding toggles. You can also drag and drop the fields to display them in a different order.
Tip: This view will apply for any/all users looking at the submissions table.
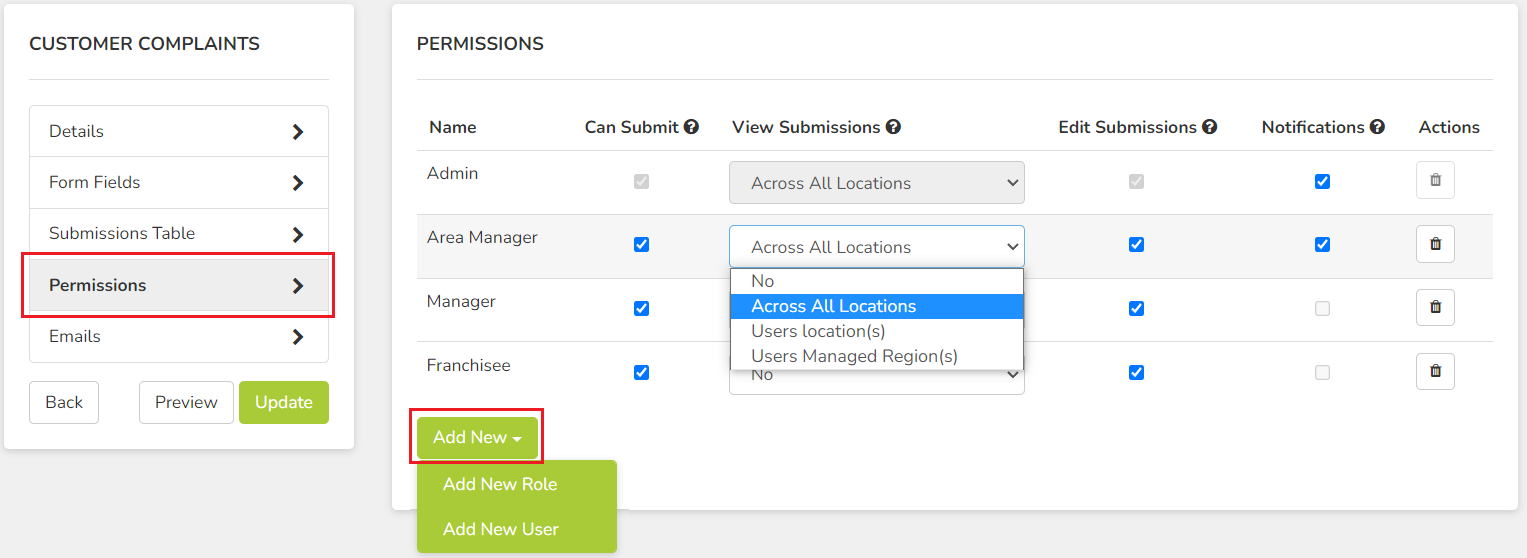
- The Permissions tab is where you set the permissions for this form.
- Can Submit: The Role/User can make submissions on this form.
- View Submissions:
- No: This means the Role/User can only view their own submissions, no one else's.
- Across All Locations: The Role/User can view ALL submissions from every user across every location.
- Users Location(s): The Role/User can view all submissions from other users at the same location(s) as them.
- Users Managed Region(s) - The Role/User can view all submissions from other users at the locations within in the region(s) they manage.
- Edit Submissions: This allows the Role/User to edit the submissions after they have been completed/submitted.
- Notifications: This will send an email notification of the completed submission to the Role/User that is ticked.
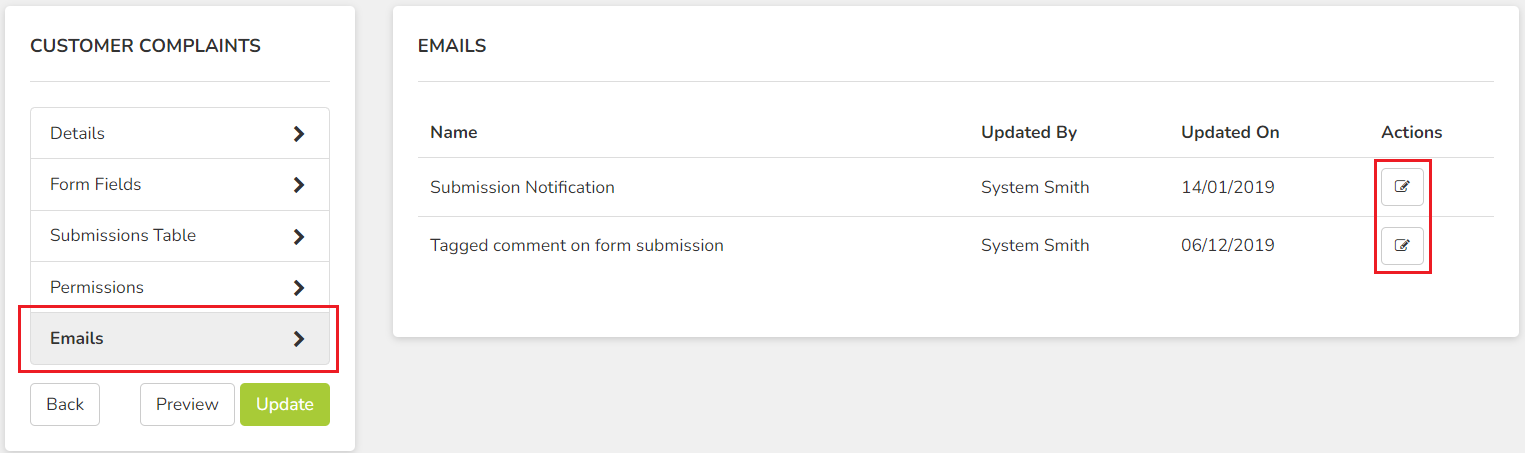
To add a new Role/User/User Group to the permissions, click the Add New button. To delete, click the bin icon under Actions. - The Emails tab is where you can edit the automated email templates for this form. These will default to the templates within the System Settings, and are optional to edit on a form by form basis.
- Preview the form before publishing to ensure it's correct, then click Publish to make it available for submissions.


Tip: After there have been submissions made against a form, you are able to add additional fields, but not delete any. However, you can "deactivate" the fields so they do not show up for any new submissions.